We’ve updated the theme to make editing your site’s menu much simpler. This improvement comes with the release of Cornerstone Theme 4.0.0. From now on, you’ll use the Classic Menu editor to manage your menus, while the Site Editor is only used to choose which menu displays.
Which menu do I edit?
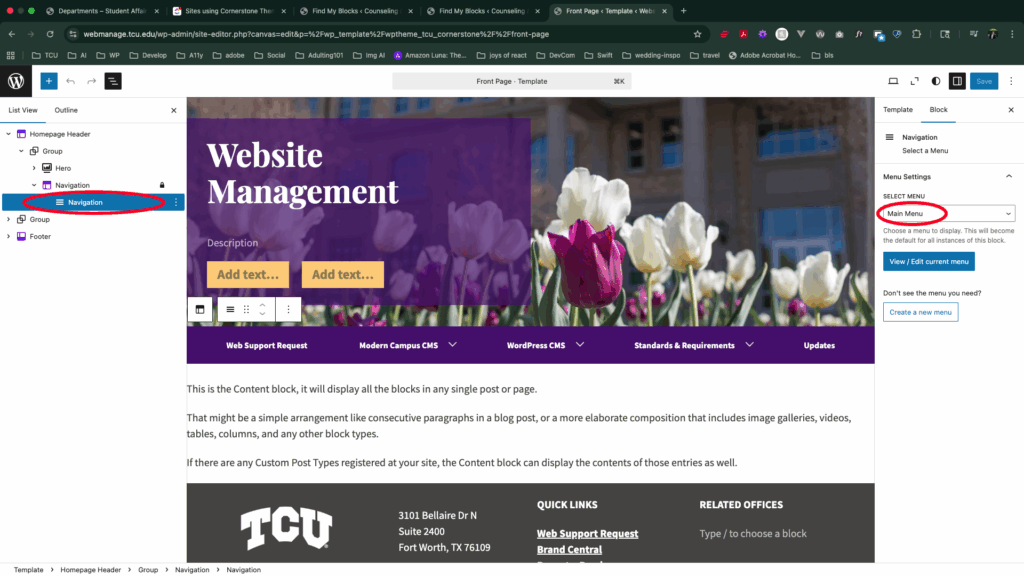
We’ve already migrated your existing menus for you. In the Site Editor, select the Navigation block (not the template part). Here you can see which menu is currently assigned (e.g., Main Menu). That’s the menu you’ll want to edit.
What’s different?
- Before: You had to go into Edit Site and rearrange the menu there.
- Now: In the editor, all you need to do is select the Navigation block (not the template part) and choose which menu to display (e.g., Main Menu). To actually edit the menu’s links and structure, go to Appearance → Menus in the dashboard, make your changes, and be sure to save them.
This change should make managing your menus faster and easier, while also providing a simpler experience for both editing and creating menus.
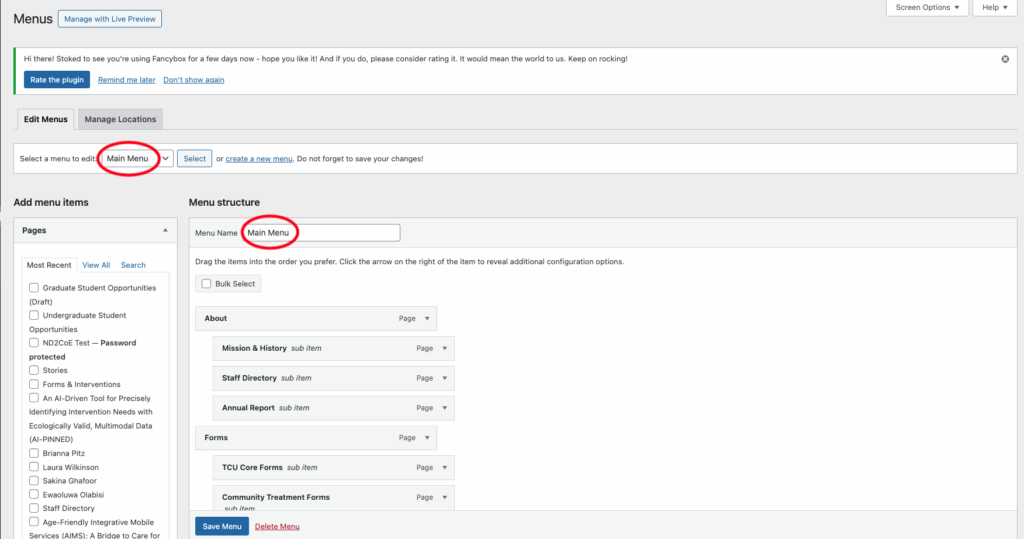
Using the Classic Menu Editor
- In your WordPress dashboard, go to Appearance → Menus.
- At the top, select the menu you want to work on (or create a new one).
- Add items: Use the panels on the left (Pages, Posts, Custom Links, Categories) and click Add to Menu.
- Reorder items: Drag and drop menu items into the order you prefer. Indent items to create sub-menus.
- Rename items: Expand a menu item and edit the Navigation Label.
- Rename the menu itself: Update the Menu Name field for easier reference later.
- Assign the menu: Under Menu Settings, choose where it should appear (e.g., Primary/Top menu).
- When finished, click Save Menu.